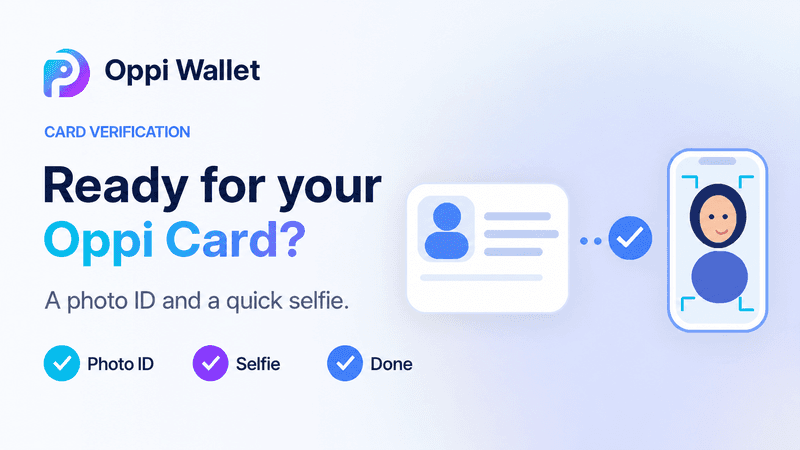
How do you verify your ID for a crypto card? The Oppi Wallet steps

You have set up your Oppi Wallet and you are ready to spend your crypto with a card. There is only one step in the way, and that is a simple ID verification.
You'll learn how to confirm your identity for the Oppi crypto card, what to prepare and how to prevent the small errors that lead to delays. The average time is 2 minutes for most people.
How Do You Verify Your Id For The Oppi Crypto Card?
Open the Oppi Wallet app, go to the services section and tap Apply For Oppi Card. Upload a valid government-issued photo ID (Passport or National ID Card or Driving Licence) and take a picture of yourself.
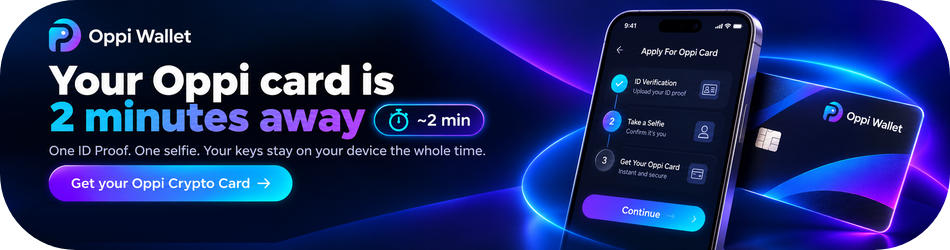
Most people complete this in approximately 2 minutes. After approval, you can activate your virtual crypto card and top up your card with crypto to spend it anywhere.
Why Does A Self-Custody Wallet Need Id Verification For The Card?
Here is the part that surprises many people.
Your Oppi Wallet itself does not need ID verification. You can create a wallet and store crypto without sharing any documents.
The crypto card is different. KYC stands for "know your customer," which is a simple identity check. Oppi cards run on the Visa network, and anyone who issues cards on that network must confirm who the cardholder is.
This is the same rule that your bank uses. It comes from important rules that comes from global anti-money-laundering standards. The group called the Financial Action Task Force (FATF) tells places that help with cryptocurrency to check who their customers are, just like banks do.
Keep in mind that verification serves only to establish your identity. It does not change how your wallet works.
What verification does not change:
-
Your private keys stay on your device the whole time.
-
As long as you don't top up the card, your crypto remains in your wallet.
-
Oppi never requests your 12-word seed phrase during verification. If it is requested by anybody, then it is a scam!
Looking for an alternative to hold your keys? We have a guide that explains in simple language that anyone can understand: beginner's guide to self-custody wallets.
What you need before you start
A little preparation is what makes the 2-minute promise realistic. Gather these items first:
-
A valid government-issued photo ID, like a passport or national ID card. Make sure it is not expired.
-
Your smartphone, with camera access enabled for the Oppi Wallet app.
-
Adequate lighting; natural daylight near a window is ideal.
-
A plain, dark surface to lay your ID on.
-
Your personal information, exactly as it appears on your ID.
-
A reliable internet connection.
-
The most recent version of the Oppi Wallet app, available from the official App Store or Google Play.
Have not set up your wallet yet? We have a 10-minute wallet setup guide that walks you through it.
Check card availability first
Card availability depends on local rules and international sanctions, so the Oppi card is not offered everywhere. At this time, the virtual crypto card is not available in Cuba, North Korea, Egypt, Iran, Myanmar, Nigeria, Russia, Bangladesh, Ukraine, Venezuela, South Africa or Syria.
The list is subject to change. Also the app will alert you if the card is available in your region or not, it's worth checking before uploading any documents checking it out.
How To Verify Your Id For The Oppi Card: Step By Step
Follow these below six steps in order to verify. Each one takes only a few seconds.
Step 1: Open Oppi Wallet and Apply Card
Open the Oppi Wallet app and tap the button to apply for the Oppi card in the Services section. If you do not have the app yet, download it from the official App Store or Google Play listing and create your wallet first.
Write down your 12-word recovery phrase and keep it offline before you do anything else.
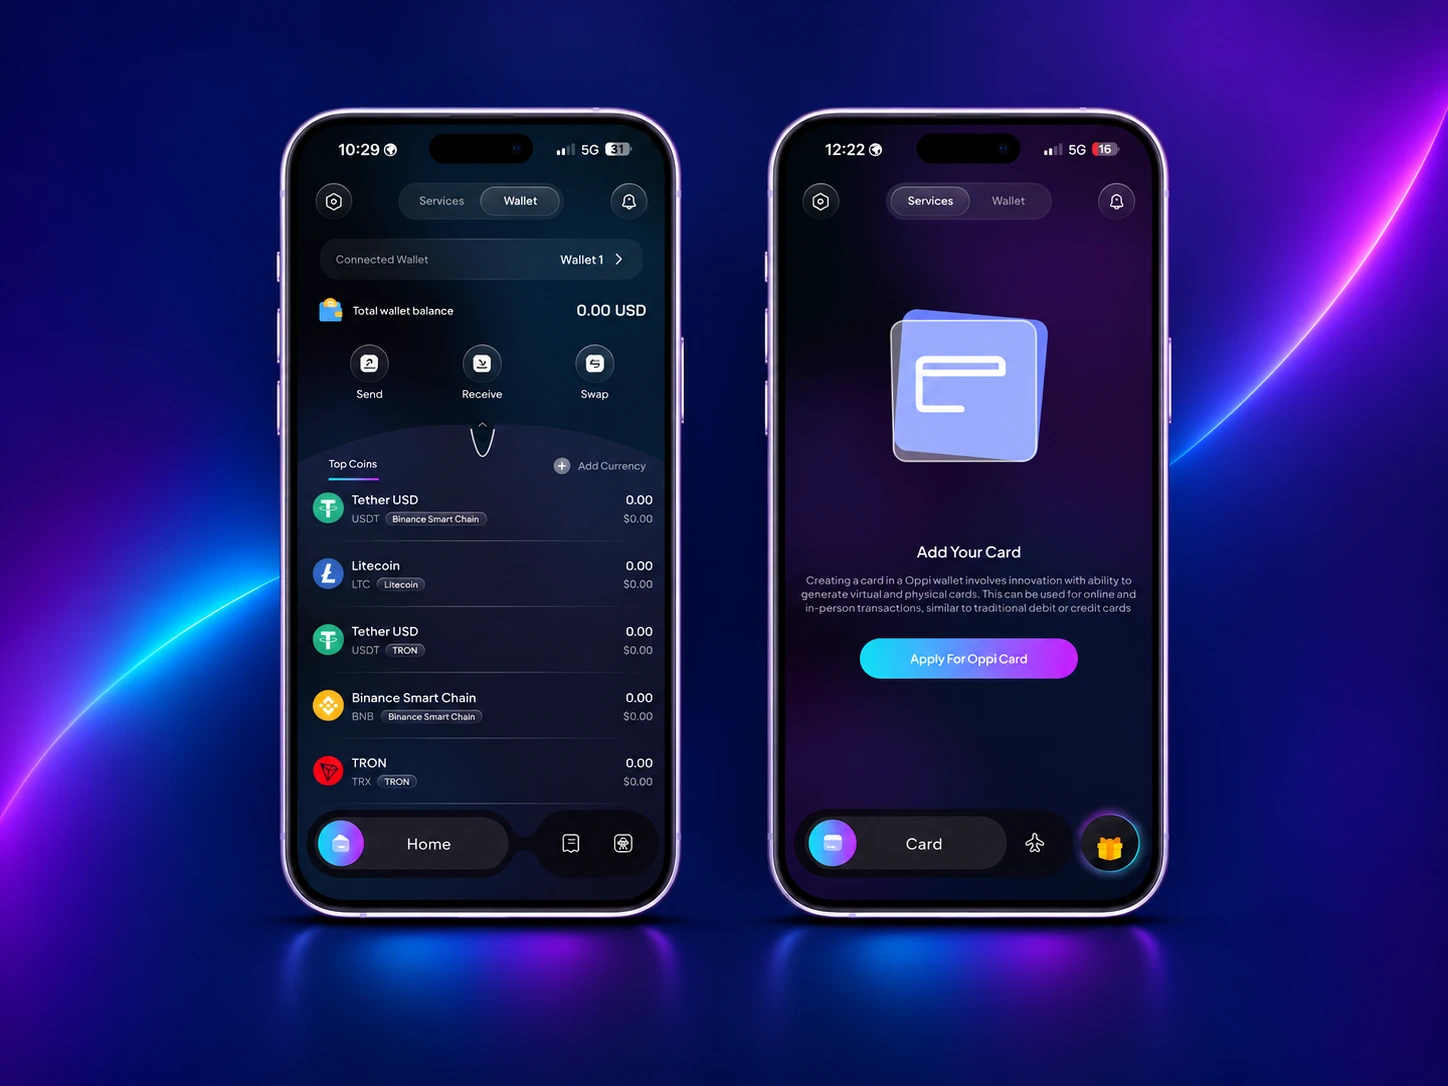
Step 2: Tap Apply For Oppi Card
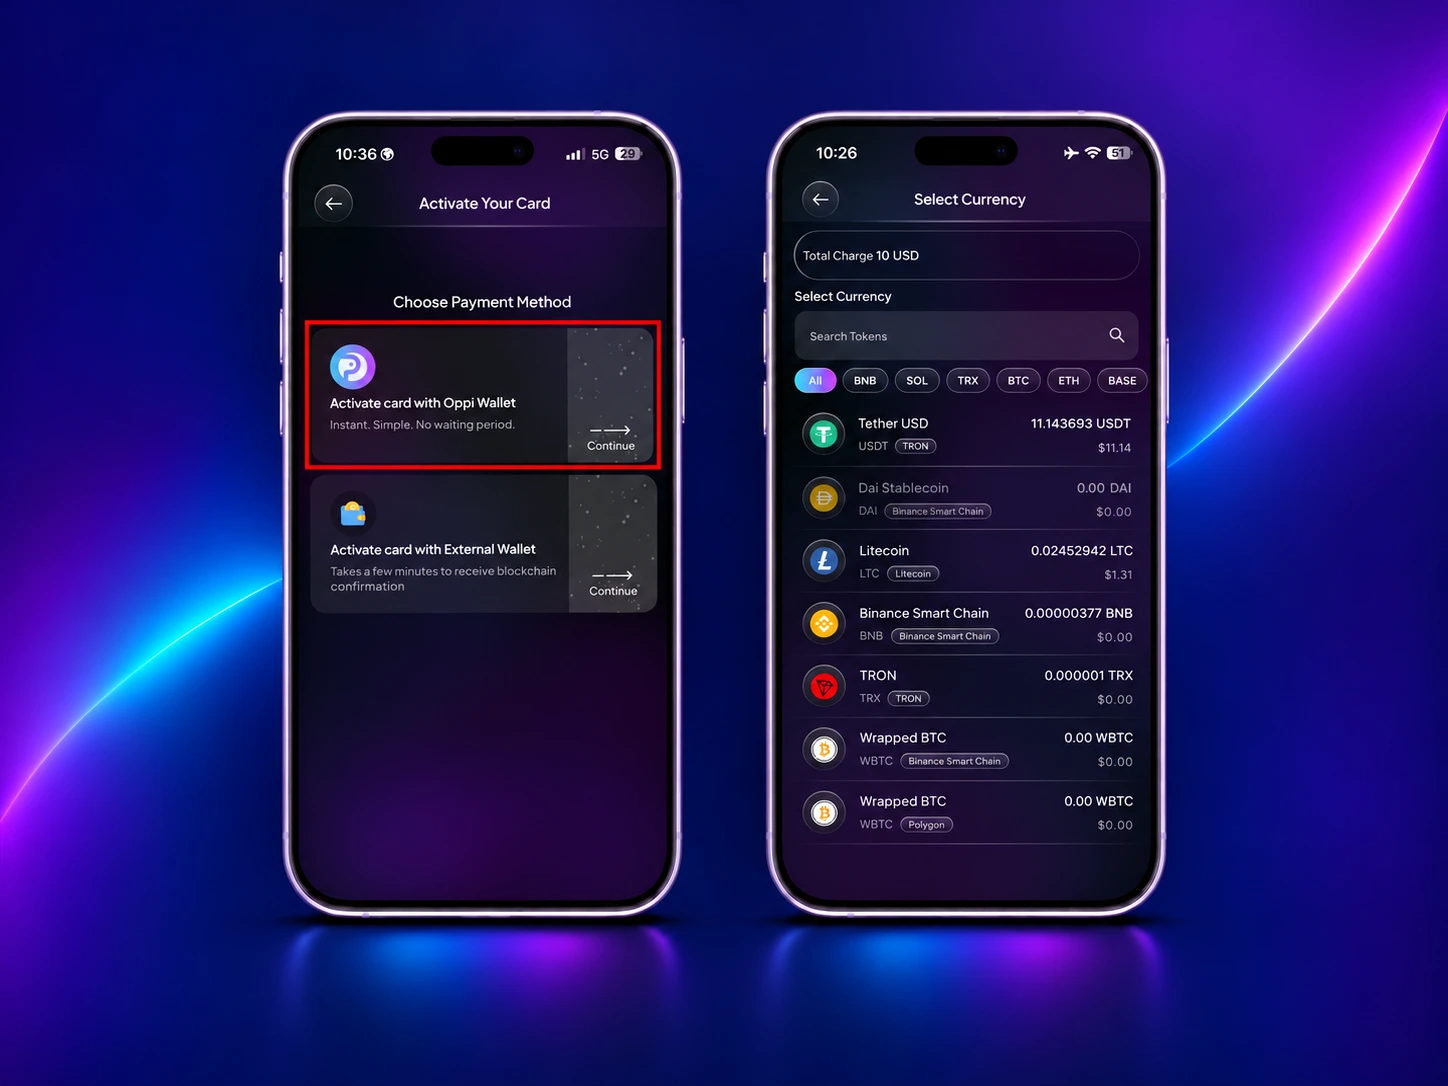
The app takes you to the card details screen. Tap Create Card, fill in your details, and then choose a payment method for your card.
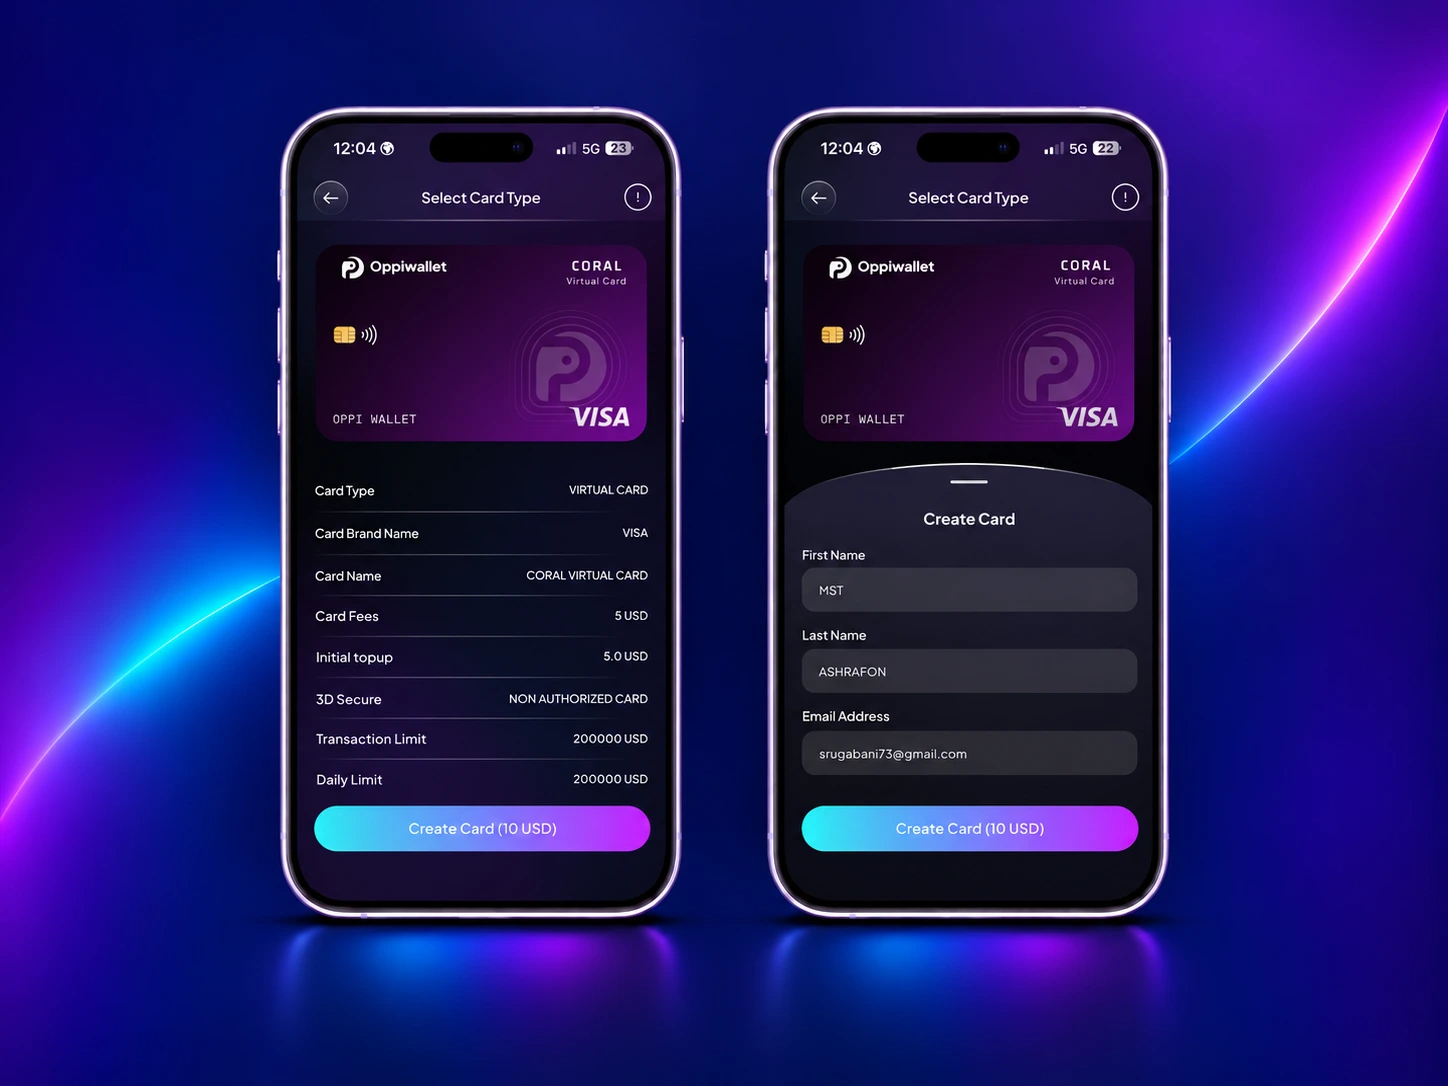
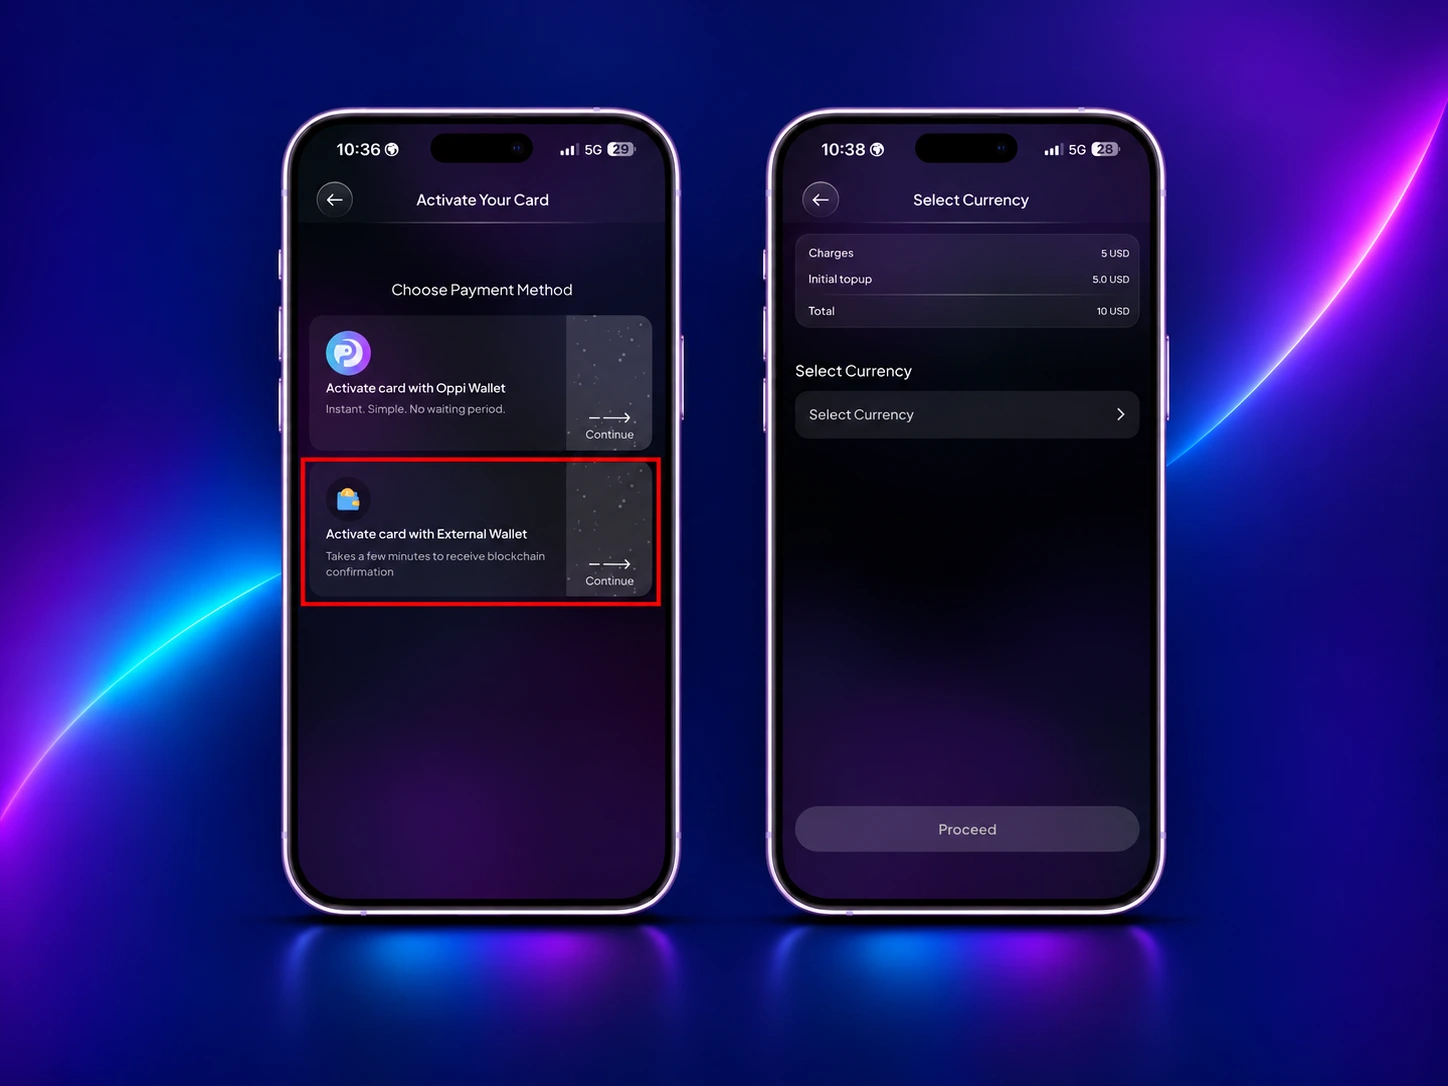
You will see two options:
-
Activate card with Oppi Wallet: Pay from the balance in your wallet. You need $10 in your wallet first. Once your card is created, $5 is refunded to you, so the card effectively costs $5. There is no waiting period.
-
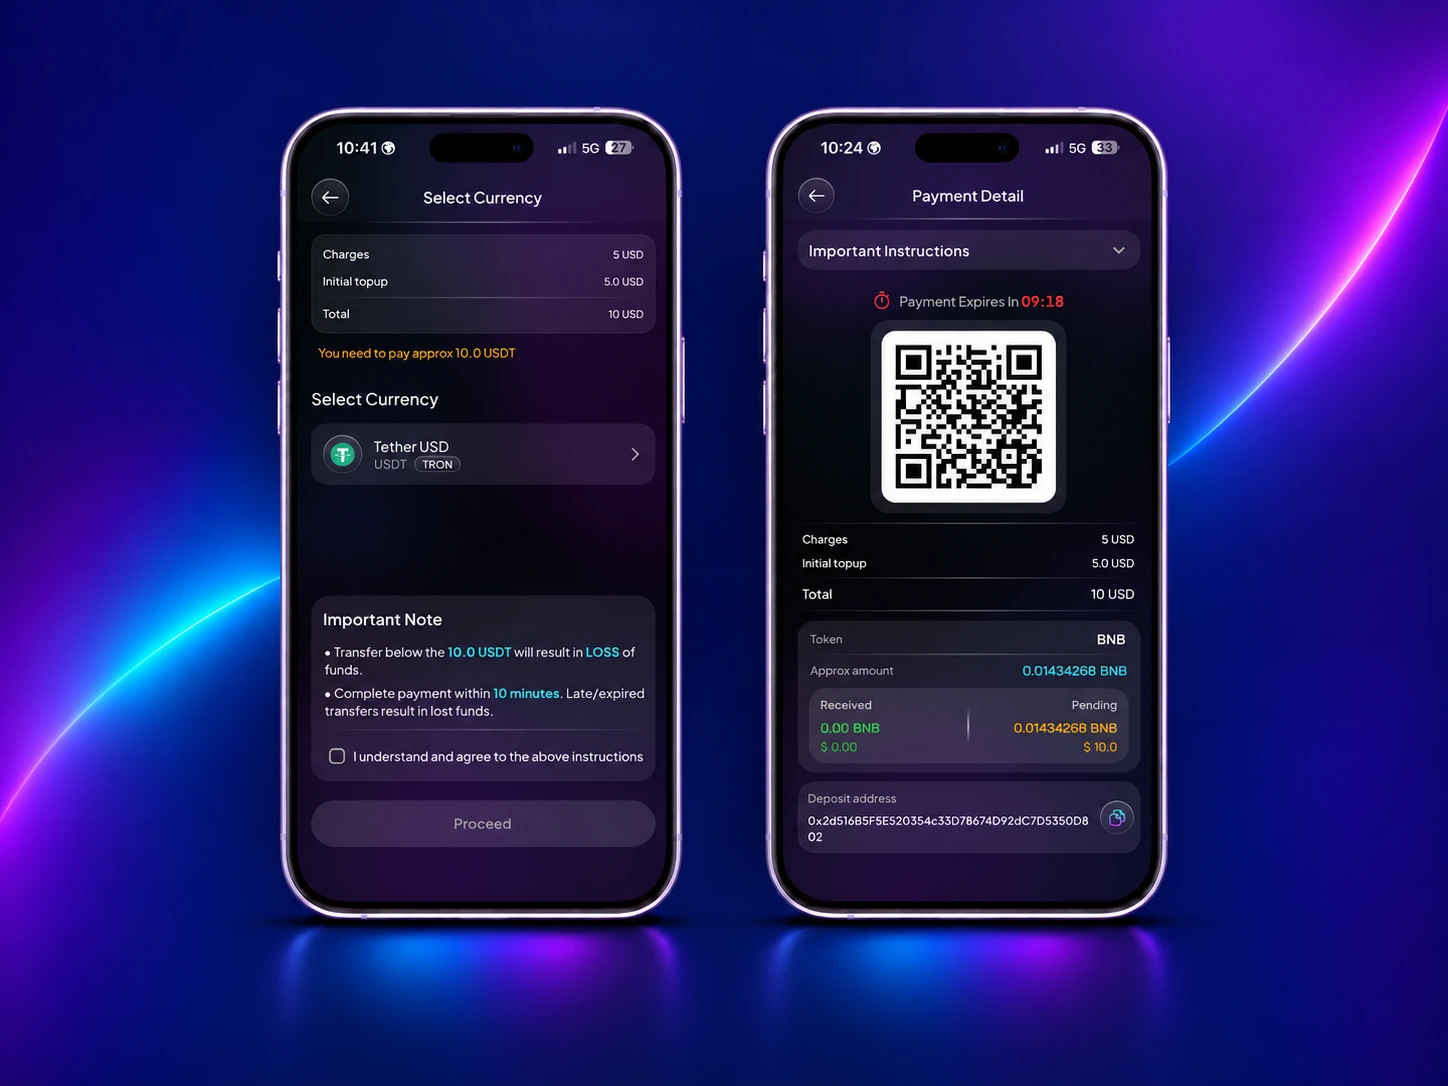
Activate card with an external wallet: Pay from another wallet or an exchange. Select one of the accepted currencies: BNB, USDT on BNB, TRON, USDT on TRON. Confirm your choice and tap to proceed with the payment. Then scan the QR code or copy the deposit address and send the payment.
If you pay from an external wallet, double-check that you send the exact currency on the matching network. A payment sent on the wrong network may be lost.
After your payment goes through, the identity verification flow starts. You will be asked to complete KYC before your card appears.
Step 3: Upload your government-issued ID
Choose your document and take a photo of it when the app asks. Keep all four corners inside the frame and make sure the text is sharp.
Look for light glare spots and tilt the ID slightly if you notice that light is reflecting off the ID. One of the most frequent check fail reasons is glare over your photo or your details.
Step 4: Take your selfie
Follow the prompts on screen to take a selfie. The system compares your face with the photo on your ID. Remove glasses and hats, face the camera straight on, and make sure nobody else is in the frame.
Step 5: Submit and wait for confirmation
Submit your details and keep the app open until you see your verification status. Oppi is a one-to-one verifier, meaning there's only one verification level to go through.
Most people complete this step in about 2 minutes. You can also check your status later inside the app.
Step 6: Activate your virtual card and top it up
Once you are approved, your card shows up in the Card section. Then top up the card with the crypto you want to spend.
If you need to add funds first, you can receive crypto straight into your crypto wallet from an exchange or from another wallet.
If you want a different token, you can use Oppi's instant swap crypto feature before you top up.
Ready to get your Oppi crypto card?
Apply for your card in the app and finish your ID check in about 2 minutes. Your keys stay on your device the whole time.
Get Oppi Wallet and Apply NowTips To Avoid Rejection And Pass The First Time
Most failed ID checks across the industry come down to small photo problems, not anything you did wrong. These tips cover the usual causes.
-
Use an in-date document. An expired ID will fail, no matter how good the photo is.
-
Photograph the original. Avoid photocopies, printouts, screen shots or photos of another screen.
-
Remove glare. Avoid flash and tilt the ID away from bright lights.
-
Show all four corners. A cropped edge can quietly cause a failed check.
-
Match your details exactly. Use your name and date of birth as printed on the ID, with no nicknames.
-
Keep your selfie clean. Use even lighting for both the sides, no glasses and ensure the whole face is in the frame.
-
Verify once. Do not attempt to use the same identity more than once.
-
Be patient. If a check goes to review then wait until it has been done before retesting.
What if your verification is not accepted? Click pictures with more effort, compare details with the ID and take another picture. If it continues to fail, contact Oppi support within the App.
Do remember that a pending verification can block card payments, even when your balance looks fine. Our guide on why a crypto card might not work covers this and other common causes.
What's Next When You Are Approved?
After you have been verified you'll be able to use your ID card. This is what to look forward to:
-
Your card appears in the wallet app. Verification unlocks the Card section.
-
Top up only when you plan to spend. Your crypto converts to spendable balance only when you top up. The rest of your wallet balance stays untouched.
-
Add it to your phone wallet. The virtual card is compatible with Apple Pay and Google Pay, which means you'll be able to tap-to-pay at stores or input the card's details online.
-
Know your daily limit. Oppi has no tiers and one flat daily spend limit of $100,000. Before you make big purchases, look at the app as limits can change.
-
Order a physical card later. The balance on the physical card is the same as the virtual card and will cost $100 USD, one-time only, including the shipping charge.
Looking for tips for everyday crypto expenses? Read our guide on how to use a virtual crypto card. You can also compare the two formats in our virtual vs physical crypto card guide.
To see everything the card offers, visit the Oppi wallet virtual crypto card page.
Frequently Asked Questions
How long does Oppi ID verification take?
Oppi says that most people can finish checking their ID in about 2 minutes. You just need to upload a picture of your ID from the government and take a selfie. If something needs a little more checking, it might take longer, so make sure to look at your verification status in the app.
What documents do I need to verify my ID?
You need a valid government ID with your picture on it, like a passport, a national ID card or driving licence. You'll also take a selfie so they can see that your face matches the picture on your ID. Make sure your ID is not old and that the photo is clear.
Do I need KYC to use Oppi Wallet?
No. You can make and use your Oppi Wallet without KYC. You only need to verify your ID if you want to use card features, because cards work on special payment systems that have rules.
Is it safe to upload my ID to Oppi?
Yes, make sure to only upload your ID in the real Oppi Wallet app that you get from the App Store or Google Play. When you verify your ID, it just checks who you are. It doesn’t let anyone see your secret keys, and Oppi will never ask you for your special seed phrase.
Why was my ID verification rejected?
Sometimes, your picture might not work because of a few reasons. It could be that your document is old, the photo is fuzzy or too bright, the edges are cut off, the selfie is too dark, or the details don’t match your ID. Try taking a nice, clear picture of your document again. If it still doesn’t work, ask for help from Oppi support in the app!
Can I get the Oppi card in my country?
Card availability is subject to the local regulations and sanctions, and therefore not available in all countries. The app lets you know if the card is available in your area or not, so you can look before you begin.
Ready To Verify Your Id?
The final stage between self-custody wallet and using your crypto with a card is ID verification. Get your ID ready, find good light, and follow the six steps above. You can keep your keys all the time.
Ready to begin Now?
Open Oppi Wallet, apply for your card and finish ID check in two minutes.
Start verification in the appOr download Oppi Wallet